


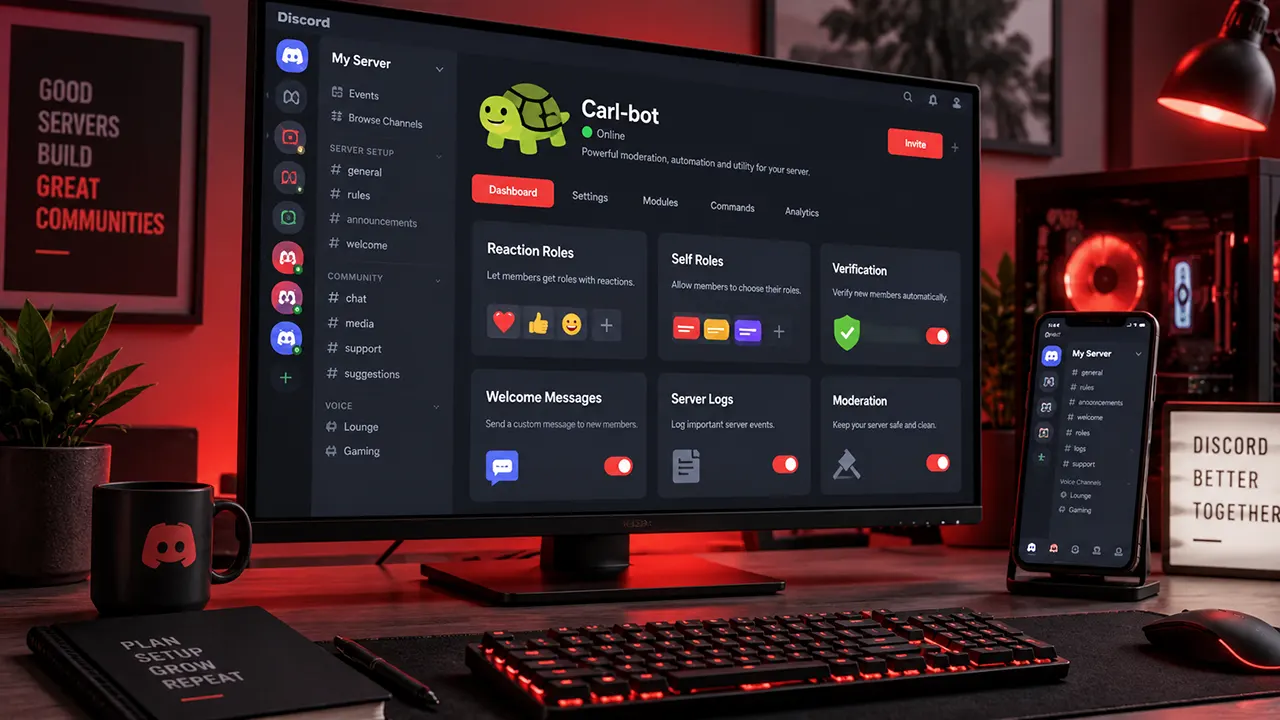
To set up Carl-bot, add it to your Discord server, authorize the required permissions, place its role above the roles it must manage, and open the Carl-bot dashboard. From there, configure the server features you need. Starting with permissions and role hierarchy prevents many setup problems later.
How to Set Up Carl Bot: Build the Foundation First
A new Discord server can quickly become difficult to manage when roles, permissions, moderation, welcome messages, and automated features are configured separately. Carl-bot brings many of those tasks into one customizable bot and provides a web dashboard for managing its settings.
This guide focuses on setting up Carl-bot in a logical order rather than throwing a long command list at you. You will first prepare the server, add Carl-bot, confirm that it can perform the actions you expect, and then move into individual features in the later sections.
One detail matters before anything else: Carl-bot cannot manage a role that sits above its own highest role in Discord’s role hierarchy. Giving the bot the Manage Roles permission alone does not override that hierarchy.
That small distinction can save a lot of frustration. If a role assignment fails later, the problem may not be the Carl-bot configuration at all; Discord may simply be preventing the bot from managing that role.
What You Can Set Up With Carl-bot
Carl-bot is a modular Discord bot that can handle several types of server automation and management from one system.
Depending on your server’s needs, the setup can include:
- Role management
- Reaction-based role assignment
- Member verification
- Welcome and farewell messages
- Server and moderation logs
- Automated moderation
- Custom commands
- Embeds
- Autoroles
- Reminders and other automated messages
You do not need to configure everything immediately. A better approach is to establish the foundation first and then activate only the features your community actually needs.
What You Need Before Setting Up Carl-bot
Before adding Carl-bot, make sure you have enough control over the Discord server to authorize an app and manage the settings it will need. Preparing the server first makes the later configuration much cleaner.
Discord Server Management Access
You should have the appropriate administrative access to the server before beginning.
This matters because several Carl-bot configuration tasks require elevated Discord permissions. If you cannot manage server settings or roles, some setup options may be unavailable even though Carl-bot itself has been added successfully.
Carl-bot Permissions
Carl-bot needs the Discord permissions required for the features you intend to use.
Do not treat the initial authorization screen as the end of the process. After adding the bot, review its role and permissions inside Discord and make sure they match the functions you plan to configure.
A useful principle is simple:
Give Carl-bot the permissions it needs for your intended configuration, but avoid granting unrelated permissions without a reason.
That keeps the server’s permission structure easier to understand and maintain.
Why Carl-bot’s Role Must Sit Above Managed Roles
Discord uses role hierarchy to determine which roles a member or bot can manage.
If Carl-bot needs to assign a particular role, that target role must be below Carl-bot’s highest role in the server’s hierarchy. The same principle applies when using Carl-bot for other role-management tasks.
For example, imagine your server has:
- Carl-bot
- Member
- Gamer
- Announcements
If Carl-bot’s role is below Gamer, it cannot manage Gamer, even if Carl-bot has Manage Roles permission.
This is one of the most important setup checks to perform before troubleshooting role-related features.
Create the Channels and Roles You Need First
It helps to decide your server structure before configuring Carl-bot.
For example, you might already know that your server will need:
- A general discussion area
- A dedicated role-selection area
- A moderation area
- A welcome area
- A rules area
The exact structure depends on the server. The important point is to create the basic Discord objects first so later Carl-bot configuration has clear destinations.
How to Add Carl-bot to Your Discord Server
Once the server foundation is ready, the next step is to add Carl-bot and authorize it for your server.
Open the Official Carl-bot Dashboard
Start with the official Carl-bot website and open its dashboard.
Carl-bot’s current dashboard provides a browser-based configuration interface and includes an onboarding flow for getting a server configured. The dashboard can be accessed from a computer, tablet, or phone.
Select Your Discord Server
After opening the dashboard, select the Discord server where you want to configure Carl-bot.
Make sure you choose the correct server before continuing. If you manage several communities, checking the server name at this stage avoids making configuration changes in the wrong place.
Authorize Carl-bot
Follow Discord’s authorization process and review the permissions requested by Carl-bot.
Authorization connects the bot to the selected server. It does not mean every possible Carl-bot feature has been configured.
After authorization, return to your server and confirm that Carl-bot appears in the member list.
Check the Bot After Installation
Before moving on, perform a quick installation check:
- Confirm Carl-bot is visible in the server member list.
- Confirm its role appears in Server Settings → Roles.
- Check the position of the Carl-bot role in the hierarchy.
- Review its permissions.
- Confirm that Carl-bot can access the channels where you plan to use it.
If something is wrong at this stage, fix the Discord-side configuration before moving into feature setup. That keeps later troubleshooting focused on the actual feature instead of an installation problem.
How to Set Up Carl-bot From the Dashboard
The Carl-bot dashboard is the main control point for configuring the bot. It lets you manage server-specific settings through a web interface instead of relying entirely on commands.
Find Your Server Settings
Open the Carl-bot dashboard and select your server.
The available settings depend on the features and permissions associated with that server. Take a moment to become familiar with the dashboard before changing multiple settings at once.
Understand the Main Dashboard Modules
Think of the dashboard as the configuration layer and Discord as the environment where the results appear.
For example:
- Discord contains your channels and roles.
- Carl-bot provides the automation.
- The dashboard controls many of Carl-bot’s settings.
- Discord permissions determine what the bot can actually do.
Keeping those responsibilities separate makes troubleshooting much easier.
If a setting appears correct in the dashboard but the bot still cannot perform an action, check the corresponding Discord permission or hierarchy rather than repeatedly changing the same Carl-bot setting.
Dashboard vs. Commands
Carl-bot supports both dashboard-based configuration and commands. The best choice depends on the task.
For broader server configuration, the dashboard can be easier to understand because related settings are grouped together. Commands can be more convenient for specific actions once you know the correct syntax.
Keeping the command reference separate also makes this guide easier to follow: this article focuses on setting up Carl-bot, while the related guide can serve readers who need a deeper command reference.
How to Set Up Reaction Roles With Carl-bot
Carl-bot reaction roles let Discord members assign predefined roles by interacting with a message. The basic process is to create the roles, build a reaction-role message, connect each emoji to a role, and choose the behavior you want. Carl-bot supports interactive setup as well as command-based configuration.
Create the Discord Roles First
Create every role that members should be able to select before building the reaction-role message.
For example, a gaming server might create:
PCPlayStationXbox
A community server might instead use roles such as:
AnnouncementsEventsGiveaways
The role names should tell members exactly what they are selecting. Avoid creating several roles with nearly identical names because that makes the selection panel harder to understand.
Create a Reaction-Role Message
Carl-bot provides an interactive setup through the reaction-role commands. The documented rr setup or rr make workflow starts the process of creating a reaction-role configuration.
The setup connects three things:
Emoji → Discord role → Reaction-role message
For example:
🎮 → Gamer → “Choose your gaming platform”
Once the relationship is created, a member can use the corresponding reaction to receive the associated role.
Carl-bot can also associate roles with an existing message rather than requiring every reaction-role panel to start from a newly generated message. The documented reactionrole add command supports adding an emoji-role pair to a specified message.
Choose the Right Reaction-Role Behavior
Not every role panel should behave like a simple on/off switch.
Carl-bot supports different reaction-role behaviors for different use cases. The documented options include normal reaction roles, unique selections, verification behavior, reversed behavior, role limits, and other configurations.
Use the behavior that matches the decision members are making.
Multiple selections: Use a normal setup when members should be able to select several independent roles.
One selection: Use a unique configuration when members should choose only one option from a group, such as one team or one platform.
One-way confirmation: Use verification behavior when reacting should grant a role without allowing the same reaction to remove it.
Choosing the behavior before publishing the panel prevents a confusing experience for members.
Connect Emojis to Roles
Each selectable role needs an emoji association.
For example:
| Emoji | Role | Purpose |
|---|---|---|
| 🎮 | Gamer | Gaming-related notifications |
| 🎨 | Creator | Creator-related content |
| 📢 | Announcements | Server announcements |
The emoji should have an obvious relationship with the role whenever possible. Clear visual cues reduce mistakes, especially when a panel contains several choices.
Carl-bot’s documented reaction-role commands also support custom emojis and message-specific role mappings.
Test the Reaction Roles
Do not assume the panel works simply because Carl-bot created it.
Test each emoji and confirm that:
- The expected role is assigned.
- The correct role is removed when the chosen behavior allows removal.
- A unique selection prevents unintended combinations.
- Members can see the reaction-role message.
- The resulting role provides the access or notification behavior you intended.
Testing one role at a time makes configuration mistakes much easier to identify.
How to Set Up Self Roles and Color Roles in Carl-bot
Self roles are roles that members can select without asking a moderator to assign them manually. Carl-bot reaction roles are useful for this because the member’s choice can be tied directly to an emoji.
Color roles use the same underlying idea, but their purpose is visual customization rather than access, notifications, or community preferences.
Self-Assignable Interest or Notification Roles
Self roles work particularly well when members have optional preferences.
Examples include:
- Game notifications
- Event alerts
- Content categories
- Community interests
- Platform preferences
- Regional communities
A good self-role panel should explain what each role does before asking members to choose it.
For example:
Choose the notifications you want to receive.
Then provide individual choices such as:
🎮 Gaming Updates
📢 Community News
🎉 Event Alerts
This makes the role system useful rather than turning the server into a long list of unexplained labels.
Color Roles
Color roles allow members to choose an available name color from a predefined collection.
A simple color panel might offer:
- 🔴 Red
- 🔵 Blue
- 🟢 Green
- 🟣 Purple
Create the corresponding Discord roles first, then associate each role with an emoji through the reaction-role configuration.
If members should select only one color, a unique reaction-role setup is more appropriate than allowing several color roles simultaneously. Carl-bot’s documented reaction-role system supports unique behavior for this type of selection.
One practical consideration is role ordering: Discord’s role hierarchy determines which color role is actually visible when multiple roles can affect a member’s display. For a clean color system, design the color roles as a deliberate group rather than creating overlapping role behavior.
When to Use Unique Mode
Use a unique configuration when the choices represent alternatives rather than independent preferences.
For example:
Choose one gaming platform:
🎮 PlayStation
🟢 Xbox
🖥️ PC
A member choosing PC should not normally need all three platform roles.
By contrast, a notification panel could reasonably allow several choices:
Choose your notifications:
📢 Announcements
🎮 Gaming
🎉 Events
The distinction is simple:
Alternatives → one choice
Independent preferences → multiple choices
Carl-bot documents unique reaction-role behavior specifically for restricting members to a single selection within a reaction-role setup.
How to Set Up Verification With Carl-bot
Carl-bot’s verification reaction-role mode is designed for a one-way confirmation workflow. A member reacts to the verification message, receives the configured role, and Carl-bot removes the reaction automatically. The role therefore represents completion of the verification action rather than a normal toggle.
How Carl-bot’s Verify Mode Works
A normal reaction role can generally behave as a toggle: reacting assigns the role and removing the reaction can remove it.
Verification mode changes that behavior.
With Carl-bot’s documented rr verify behavior:
- The reaction assigns the role.
- The reaction is automatically removed.
- The reaction cannot be used to remove the role.
This makes the mode suitable for a simple confirmation step.
Create a Verification Role
Create a dedicated role for members who complete your verification step.
A clear name such as Verified is easier for moderators to understand than a vague name such as Level 1.
The role should represent a specific state:
Member has completed the required verification action.
Keep the permission design for that role separate from the reaction itself. The reaction assigns the role; Discord permissions determine what that role can access afterward.
Connect the Verification Reaction
Create the verification message and associate its emoji with the verification role.
The message should explain exactly what the member needs to do.
For example:
Verify your membership
Read the server information, then react below to confirm that you want to continue.
After the reaction-role message is configured for verification behavior, the member’s reaction triggers the role assignment and is then removed by Carl-bot.
Test the Verification Flow
Use a test account or an appropriate non-administrator account to confirm the complete experience.
Check that:
- The verification message is visible.
- The emoji can be selected.
- The verification role is assigned.
- Carl-bot removes the reaction.
- The resulting role provides the intended server access.
Testing the entire path matters because successful role assignment does not automatically prove that the channel permissions produce the experience you intended.
How to Set Up Rules With Carl-bot
Carl-bot can support a Discord server’s rules workflow, but the rules themselves should remain the source of the community’s expectations. A clean setup normally uses a dedicated rules channel, a clear rules message, and Carl-bot automation where it genuinely improves the member experience. Carl-bot’s documentation also supports welcome and moderation automation that can complement this structure.
Create a Rules Channel
Create a dedicated channel such as #rules rather than burying server rules inside a general discussion channel.
Keep the channel focused. Members should be able to open it and immediately understand:
- What behavior is expected
- What behavior is prohibited
- Where to ask questions
- What happens when rules are broken
For a public community, consider making the channel readable to members while restricting ordinary members from posting.
Use Carl-bot to Present or Automate Rules
Carl-bot can complement your rules system through automated messages, embeds, tags, and moderation features.
The goal should be consistency rather than automation for its own sake.
For example, a server could use a formatted rules message followed by a simple instruction telling new members where to continue. More advanced automation can then handle specific moderation or onboarding tasks separately.
Combine Rules With Verification
Rules and verification solve different problems.
Rules explain what members agree to follow.
Verification controls what happens after the required confirmation.
Keeping those purposes separate makes the server easier to understand. A member should not have to guess whether reacting to a message means “I read the rules,” “I accept the rules,” or “I receive a role.”
If you use a verification flow, make the wording explicit so members know exactly what their action means.
Avoid Using Rules as a Substitute for Discord Permissions
A written rule does not technically prevent an action.
Discord permissions determine what members can actually access or do. Carl-bot’s moderation and automation features can enforce particular behaviors, but the server’s permission structure remains the underlying access-control layer.
That distinction matters when designing a new server: rules communicate expectations; permissions control access; moderation handles violations.
How to Set Up a Welcome Channel With Carl-bot
A welcome channel gives new members a predictable place to receive their first server message. Carl-bot supports welcome and leave messages, and its dashboard provides controls for configuring them.
Choose the Welcome Channel
Create a channel specifically for member arrivals, such as #welcome.
Then configure Carl-bot to use that channel for welcome messages.
Carl-bot’s documentation also provides the !set welcome <#channel> command for setting the welcome/leave destination.
A dedicated channel keeps automated arrivals from interrupting normal conversation.
Create a Welcome Message
The message should answer the questions a new member is most likely to have immediately:
- Where should I start?
- Where are the rules?
- Where can I choose optional roles?
- Where can I ask for help?
Keep the first message useful rather than filling it with every server detail.
For example, a welcome message can direct members toward the rules channel and the appropriate role-selection area without reproducing the rules or role instructions themselves.
Customize Welcome Messages With Variables
Carl-bot supports variables in automated messages. Its documentation gives {user} as an example for referring to the member receiving the message.
Variables can make a generic automated message feel more specific without requiring a separate message for every member.
For example, a welcome message can address the arriving member directly and then provide a short path to the most important server resources.
Before using a complex variable in a production message, check the current Carl-bot documentation to confirm that the variable is supported for the particular message type.
Add Farewell Messages When Useful
A farewell message can notify a channel when someone leaves.
This is optional. Small communities may not need it, while larger communities may find departure notifications useful for moderation or community awareness.
Avoid turning the channel into a constant stream of low-value notifications. Automation should reduce noise, not create another source of it.
How to Set Up Logs With Carl-bot
Carl-bot logging records selected server and member events in designated channels. Its documentation provides a configurable logging system, including controls for individual event types and ignored channels.
Create a Dedicated Log Channel
Create a private channel such as #server-logs for events that moderators need to review.
Do not automatically make operational logs visible to everyone. Logs can contain information that is useful to moderators but distracting or inappropriate for ordinary members.
Carl-bot’s documentation also describes the ability to separate logging into multiple channels, which can help reduce clutter in larger servers.
Choose What Carl-bot Should Log
Carl-bot can log numerous server and member events. Its documentation gives examples including message deletions, name changes, role updates, joins, leaves, and other activity.
Do not enable every possible event simply because it is available.
Instead, decide what your moderators actually need to investigate.
For example, a moderation-focused server may prioritize:
- Message edits and deletions
- Member joins and leaves
- Role changes
- Moderation activity
A smaller community may need much less.
Keep Moderation Logs Separate From General Server Events
Moderation records and ordinary server activity serve different purposes.
Carl-bot supports dedicated moderation logs as well as broader event logging. The documentation provides !modlogs create for creating a moderation-log channel or !modlogs set <#channel> for assigning an existing channel.
Separating the two makes investigations faster because moderators do not have to search through unrelated events.
Check Whether Deleted Messages Are Logged
Carl-bot can record message-related events, including deletions, when the relevant logging configuration is enabled. The official documentation specifically identifies message deletions among the events that can be logged.
If deleted-message records matter to your moderation process, test the configuration rather than assuming it is active.
Also remember that a log records an event; it does not necessarily preserve every piece of information a moderator might want in every situation. Treat logging as a moderation aid, not as an unlimited archive.
Carl-bot Commands You Should Know
Carl-bot supports traditional prefixes as well as slash commands. Its current documentation states that the default prefixes include ! and ?, alongside slash commands, and that server administrators can change or add prefixes.
You do not need to memorize the entire command library. Learn commands according to the tasks you perform regularly.
Setup Commands
Setup-oriented commands help configure the bot’s server behavior.
Examples documented by Carl-bot include:
!prefix!set welcome!log channel!modlogs create!rr make
These belong to different configuration areas, so use the relevant documentation rather than treating them as one interchangeable command group.
Reaction-Role Commands
Carl-bot provides commands for creating, modifying, viewing, and managing reaction-role configurations.
The official documentation includes commands such as !rr make, while the roles documentation provides additional reaction-role operations.
For this guide, the important point is that commands are an alternative control method. The complete reaction-role workflow has already been covered above.
Moderation Commands
Moderation commands are designed for actions such as warnings, muting, kicking, banning, and related server-management tasks.
Carl-bot also provides AutoMod controls for automatically responding to behaviors such as spam, excessive mentions, links, invites, and other configured conditions.
Automatic moderation deserves careful configuration. A rule that is too aggressive can punish legitimate activity, while a rule that is too weak may not provide useful protection.
Logging Commands
Logging commands control the server’s event-recording behavior.
For example, Carl-bot documents !log channel <#channel> for choosing the logging destination and !log ignore <#channel> for excluding a channel from logging.
These commands are especially useful when a server’s log volume becomes difficult to manage.
Welcome and Utility Commands
Welcome configuration includes commands such as !welcome <message> and !joindm <message>, according to Carl-bot’s documentation.
For a complete command reference, use the existing ITPhobia Carl-bot Discord commands guide.
That article can serve as the deeper command resource while this guide remains focused on the overall setup journey.
What Variables Can Carl-bot Use?
Carl-bot variables allow automated messages to insert dynamic information instead of displaying exactly the same text for every member. The official documentation specifically shows variables such as {user} in welcome messages.
Why Variables Matter
A static message might say:
Welcome to the server!
A variable-based message can address the arriving member directly.
That small change is useful for welcome messages, automated responses, and other situations where the recipient or context changes from one event to another.
Variables in Welcome and Automated Messages
Carl-bot’s documentation states that variables can be used with welcome messages and gives {user} as an example. Carl-bot also supports customizable messages through its broader command and tag system.
Use variables where they add useful context. Avoid building complicated messages simply to make automation look sophisticated.
Check Current Variable Support Before Publishing a Complex Message
Variable support can depend on the particular Carl-bot feature where the message is used.
Before publishing a complex automated message, verify the current documentation for that specific command or message type. This is safer than assuming that a variable supported by one feature will behave identically everywhere.
Why Isn’t Carl-bot Creating Reaction Roles?
When Carl-bot does not create or assign a reaction role correctly, check the configuration in a fixed order rather than rebuilding everything. The most useful checks are the Discord role hierarchy, the bot’s ability to manage the target role, channel access, and the reaction-role configuration itself. Carl-bot’s FAQ specifically points to role hierarchy as a common cause.
Check the Role Hierarchy
Confirm that the target role is below Carl-bot’s highest role.
If the target role is higher, Discord prevents Carl-bot from managing it. This is a Discord permission rule rather than a reaction-role-specific setting.
Check Manage Roles
Make sure Carl-bot has the permission required to manage the relevant roles.
If the hierarchy is correct but role assignment still fails, review the bot’s effective permissions and the server/channel configuration.
Check Channel Permissions
The bot needs appropriate access to the channel containing the reaction-role message.
Check whether Carl-bot can:
- View the channel
- Read message history where required
- Add reactions
- Send messages when the configuration requires it
A configuration can appear correct while the bot is simply unable to interact with the channel.
Check the Reaction-Role Configuration
If Discord-side access looks correct, inspect the reaction-role configuration itself.
Check that:
- The intended message is being used.
- The correct emoji is associated with the role.
- The intended reaction-role behavior was selected.
- The target role still exists.
- The configuration has not been changed or removed.
Carl-bot’s FAQ also documents !rr show as a way to inspect existing reaction-role configurations.
Check Custom Emoji Access
If the setup uses a custom emoji, verify that the bot and relevant members can use it in the server context.
When troubleshooting, temporarily testing with a standard Discord emoji can help isolate whether the problem comes from the reaction-role configuration or the custom emoji itself.
Rebuild or Repair the Reaction Role
Only rebuild the configuration after checking the simpler causes.
A useful troubleshooting order is:
Role hierarchy → permissions → channel access → configuration → emoji
That order prevents unnecessary rebuilding and helps identify the actual source of the problem.
Is Carl-bot Free, and What Does It Cost?
Carl-bot has a free tier, but it is not accurate to describe every Carl-bot capability as unlimited and completely free. The bot offers additional premium functionality and limits, so the practical question is which features your server actually needs before paying for anything.
What You Can Do Without Premium
A basic Carl-bot setup can cover many common Discord-server tasks without requiring a paid plan, including the core configuration workflows described in this guide.
For a small or growing community, that may be enough. You can start with the features your members actually need and only consider premium functionality when a specific limitation becomes relevant.
What Premium Adds
Premium is mainly relevant when you need higher limits or functionality that is restricted to paid users.
Because Carl-bot’s feature limits and premium offerings can change, check the current official Carl-bot premium information before making a purchase rather than relying on an old pricing figure from another guide.
When Premium Makes Sense
Premium makes the most sense when a specific server requirement exceeds the free configuration you already have.
For example, a large community with many role configurations may care more about higher limits than a small private server does.
The best approach is therefore:
Start free → identify a real limitation → verify the current premium requirement → decide whether the upgrade solves it.
Is Carl-bot Better Than Dyno, MEE6, or Sapphire?
There is no universal winner because these bots emphasize different parts of Discord server management. Current 2026 comparisons commonly position Carl-bot around reaction roles, logging, embeds, tags, and automation, while Dyno is often stronger for moderation and MEE6 emphasizes broader community-management features.
Carl-bot vs Dyno
Choose Carl-bot when role automation, reaction roles, logging, embeds, or customizable server workflows are central to your setup.
Choose Dyno when moderation is the primary requirement and you want a bot built heavily around moderation and AutoMod capabilities.
The important distinction is not simply which bot has more features. It is which bot matches the job your server needs done most often.
Carl-bot vs MEE6
MEE6 is a broad community-management platform with features that can include leveling and other engagement tools, while Carl-bot is particularly useful for configurable server automation and role-based workflows.
If your priority is sophisticated role selection and server automation, Carl-bot can be a strong fit. If your priority is a different combination of community engagement features, MEE6 may be worth evaluating separately.
Pricing and feature availability change over time, so compare the current plans before making a decision.
Carl-bot vs Sapphire
Sapphire is another Discord bot option with overlapping server-management capabilities.
Rather than choosing based on a generic “better” claim, compare the exact features your server needs:
- Reaction/self roles
- Moderation
- Logging
- Welcome automation
- Custom commands
- Automation
- Dashboard experience
- Free-tier limits
A bot that is excellent for one server can be unnecessary for another.
Which Discord Bot Fits Your Server?
Use the simplest decision rule:
| Your main priority | Consider |
|---|---|
| Reaction and self roles | Carl-bot |
| Detailed moderation focus | Dyno |
| Broad community-management features | MEE6 |
| Alternative all-purpose bot | Sapphire |
These are starting points, not universal rankings. Current feature sets and pricing can change, so verify the specific capability you need before migrating a working server.
Frequently Asked Questions About Carl-bot
1. Is Carlbot totally free?
Carl-bot has a free tier, but the service also offers premium functionality and higher limits. Whether the free version is sufficient depends on your server’s size and configuration. If you need a specific premium feature or have reached a limit, check Carl-bot’s current official premium information before deciding whether an upgrade is necessary.
2. Can Carlbot ban members?
Yes. Carl-bot supports moderation actions that include banning members when the bot has the necessary permissions and the relevant moderation configuration is enabled. Its AutoMod documentation lists ban and temporary bans among available punishment actions.
3. How do I get Carl-bot to say something?
Carl-bot can send automated messages through its messaging, tag, command, and automation features. The exact method depends on what you want the bot to say and what should trigger the response. For a simple reusable response, Carl-bot’s tag/custom-command system is often more appropriate than creating a new moderation rule.
4. Does Carl-bot track deleted messages?
Carl-bot can log message deletions when the relevant logging configuration is enabled. Its documentation specifically lists message deletions among the events that can be recorded.
Logging should be treated as an event record, not as a guarantee that every piece of deleted-message context will always be recoverable.
5. Why isn’t my Carl-bot creating reaction roles?
Start with the role hierarchy, then check Carl-bot’s role-management permissions, channel access, the reaction-role configuration, and the emoji being used. Carl-bot’s own FAQ identifies role hierarchy as a common cause of reaction-role problems.
6. What all can Carl-bot do?
Carl-bot provides a broad set of Discord-server tools, including reaction roles, logging, moderation, AutoMod, welcome messages, embeds, tags, triggers, reminders, and other automation. The exact capabilities and limits can change, so the official documentation is the best place to verify a feature before building your server around it.
7. Is Carl-bot better than Dyno?
It depends on the server’s main requirement. Carl-bot is a strong choice when configurable roles, reaction roles, logging, and automation are important. Dyno is often a better fit when moderation is the primary concern. Current 2026 comparisons similarly distinguish the two by their main strengths rather than identifying one as universally superior.
8. Which is better, MEE6 or Carl-bot?
Neither is automatically better for every server. Carl-bot is particularly relevant to servers that need configurable role systems and automation, while MEE6 offers a different mix of community-management features. Compare the current features, limits, and pricing against your actual requirements instead of choosing from a generic ranking.
9. Is Sapphire better than Carl-bot?
That depends on which features matter to you. If your server depends heavily on Carl-bot’s role and automation workflow, switching may offer little benefit. If another bot provides a feature or workflow your server specifically needs, comparing that capability directly is more useful than treating either bot as universally better.
10. Which is the most used Discord bot?
There is no single authoritative, continuously updated public measure that can reliably establish one Discord bot as the most used across all servers. Bot presence, server count, active users, and engagement are different measurements, so claims that one bot is definitively “the most used” should be treated cautiously unless they cite a current, comparable dataset.
Finish Your Carl-bot Setup With a Quick Server Check
Your Carl-bot setup is ready for real use when the important workflows work as intended, not simply when the bot appears in the server member list.
Before considering the setup finished, test the member experience from start to finish. Confirm that members can access the right areas, receive the expected roles, see the appropriate automated messages, and that moderators can review the events they actually need to monitor.
Then keep the configuration simple. A Discord server rarely becomes better because every available automation is enabled. The strongest setup is the one members understand and moderators can maintain.
If you want to go deeper into commands after completing the setup, continue with the existing Carl-bot Discord commands and usage guide.
Find Carl Bot documentation here.

Belayet Hossain is a Senior Tech Expert and Certified AI Marketing Strategist. Holding an MSc in CSE (Russia) and over a decade of experience since 2011, he combines traditional systems engineering with modern AI insights. Specializing in Vibe Coding and Intelligent Marketing, Belayet provides forward-thinking analysis on software, digital trends, and SEO, helping readers navigate the rapidly evolving digital landscape. Connect with Belayet Hossain on Facebook, Twitter, Linkedin or read my complete biography.